The technical complexity in badminton is for sure one of the biggest challenges and can be quite overwhelming if you are just starting out. The sole number of different shots that you can play is already incredible. There are multiple different ground strokes like Clear, Smash or Netshots and each shot can be played with forehand and backhand. On top you can play cross, longline or to the middle and in addition to that you can also variate each shot, for example by adding slice, spin or change the tempo of your movement.
I think it is important to have a lot of variations if you want to become a good badminton player but if you train every shot individually I am sure you will have a hard time to get there if you are not willing to spend 10+ hours on court every day. But here are the good news: If we take a closer look at the movements and especially the similiarties of all the shots there are in badminton, we can break them down to a very short list of skills. In this article I will show you the 4 skills that are essential in my eyes to hit all the basic shots and I will also give you a few examples how you can train them, even at home and without a partner.
Skill Nr. 1: The starting position
Watch a badminton match on youtube and focus on the first thing the players do with their racket, after the opponent hits a shot. You will probably see, that they quickly go into a fixed starting position and have a short moment of rest, before they play their shot. That position is essential, to hit with control and should be one of the first things you should learn and internalize.
A fixed starting position will give you the basis for your shot and will make it possible to reproduce them with high precision, something you defintly want in your game! The starting position variates depending on the shot. If you compare different top players you will also realize, that there are slight differences in their style, but they all follow the same guidelines:
Overheadshots:
No matter what overhead shot you play, you should always start it from the same starting position. Just imagine you already show your opponent that you will play a drop shot before you even start your hitting motion. Here you can see the most important markers for a good starting position for an overhead shot:
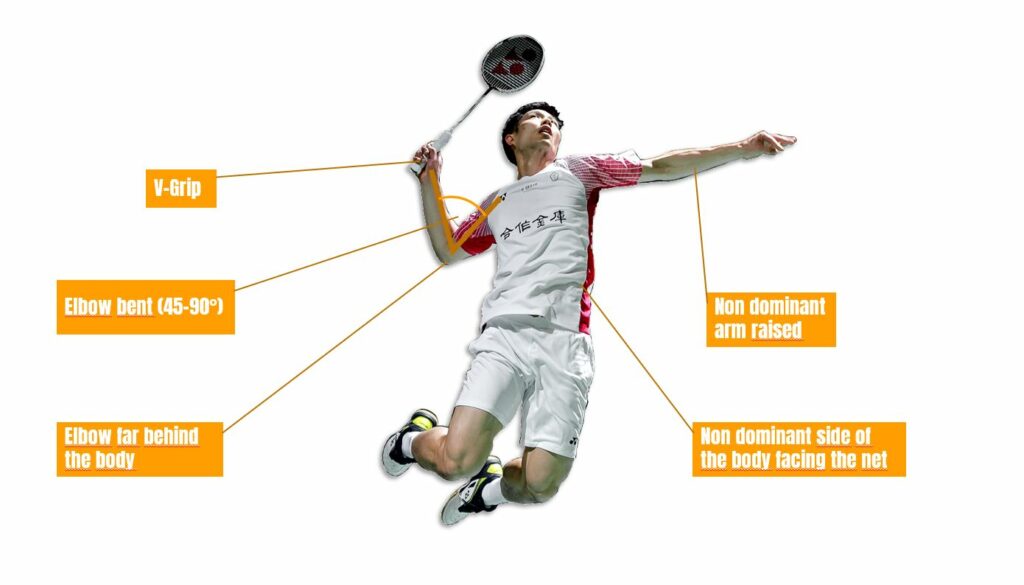
Notice that the angle of the elbow can variate, but it should be below 90 degrees. Also curcial: turn your body, so your non dominant side of the body is facing the net. Besides the racket arm you also want to raise your other arm, that will give you more stability in your upper body and increase the control in your shots. More about the grip will follow in the next section.
Netshots
When it comes to netshots your starting position depends on two things: How high will you be able to hit the shuttle at the net, and how much power can you create with your fingers. Experienced players can hit all kinds of net shots with a super short movement by mainly using their fingers (more about that at skill nr. 4). Here you see an example for a starting position at the net, when you are get to shuttle high and early.
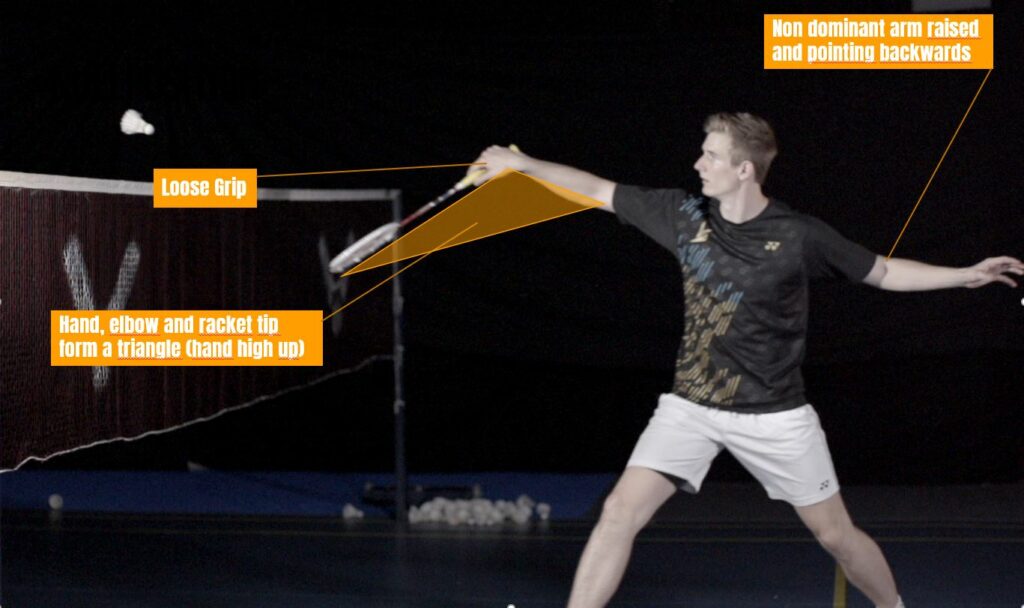
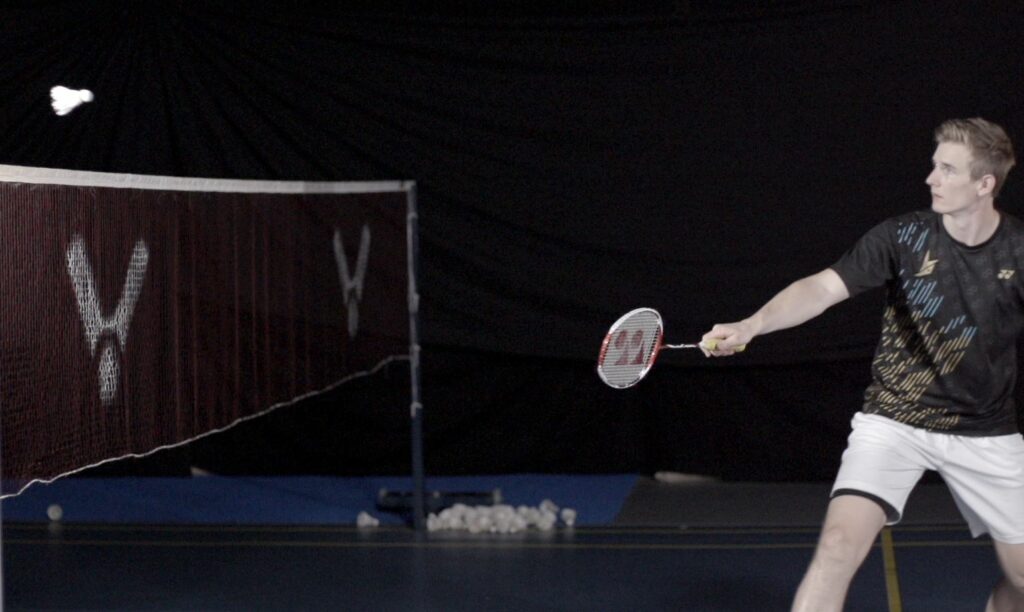
Again raise your non dominant arm for more control before your shot, and focus on the triangle you can see in the picture above. If you don’t have so much power in your fingers yet or if you are about to hit the shuttle very low, it will be tricky to play a lift from such a stretched starting position. Here it will help you if you start with the racket arm a little bit more bent, with the racket pointing not so much towards the net but more to the side and the hand a little bit lower so you can play shots with a longer swing.
Skill Nr. 2: Grip, Angle and Rotation

A lot of beginners start out with a wrong grip for basic shots, that makes it easier to hit the shuttle in the beginning but that leads to a lot of problems and will limit your technical skills and power: the so called pan handle grip. By holding the grip like a pan you will hit the shuttle with a straight forward movement with a lot of wrist movement and very little to no rotation in your body and in your arm. You will already have problems to get into the right starting positions that I described above and hit the shuttle properly but you will always tend to stand frontal to the net.
Instead you want a so called standard V-Grip. In the following short video I show you the right technique for the basic shots in terms of grip, wrist and forearm:
Skill Nr. 3: Kinetic chain and swing
In the beginning I mentioned the crazy amount of different shots, but if you take a closer look you will see a lot of similarities in the arm movement during shots that may seem totally different at first. Let’s take a smash for example: From the starting position the elbow accelerates up and forward. Because of that explosive elbow movement, the arm rotates outwards and the rackethead falls back. From there on you accelerate the racket by stretching the arm and rotating for- and upper arm into the other direction (Skill Nr. 2).

Now what happens during a backhand underhand clear? Again from the starting position the elbow moves forward towards the shuttle, the arm rotates (this time inwards) and the rackethead falls back. For hitting the shuttle once again the arm needs to stretch and for- and upperarm rotate.

This pattern you also find at almost every other shot like clear, serve or drop. It just happens in a different position, with a different range of motion and the direction of the rotation is mirrored in terms of forehand and backhand shots.
But now the important part about that skill: You don’t want to string together the movements i just described one after another but you want them to be connected to each other with a smooth flowing motion, a so called kinetic chain. Especially when you want to create power, it gets super important, that one movement has a positiv effect on the next one to get a good accelereation on the racket.
A whiplash is a good picture to have in mind when it comes to kinetic chains. When you swing a whip the movement gets faster the closer you get to the tip. The same thing you want, when you hit a power smash for example. You want to use power from you full body and start with your lower body to eventually get maximum acceleration up into your racket. So here not only the arm movement plays a role, but also the movement of the hip and the shoulder. In that video I show step by step, how the chain works when you hit overhead shots like smashes or clears:
Skill Nr. 4: Fingerpower and Grip Variation

I said you can play almost every shot with the skills i mentioned above but there are a few exceptions. Especially in the midcourt and at the net there are some shots, where you want to create power more by loosening and tightening the grip than by rotation and swing of the arm. Perfect examples are drive shots and net kills, where you only have limited time and where you want to limit the swing of the racket to be ready for the next shot or to not hit the net. On the backhandside the grip where you can hit with the most fingerpower is the so called thumb grip. Just turn the standard V-Grip 90° and put your thumb on the wide side of the racket. On the forehandside it is the panhandle grip, that allows you to use a lot of fingerpower. When you loosen the grip you mainly hold the racket with your thumb and your index fingers and try to creates space between your palm and your grip.
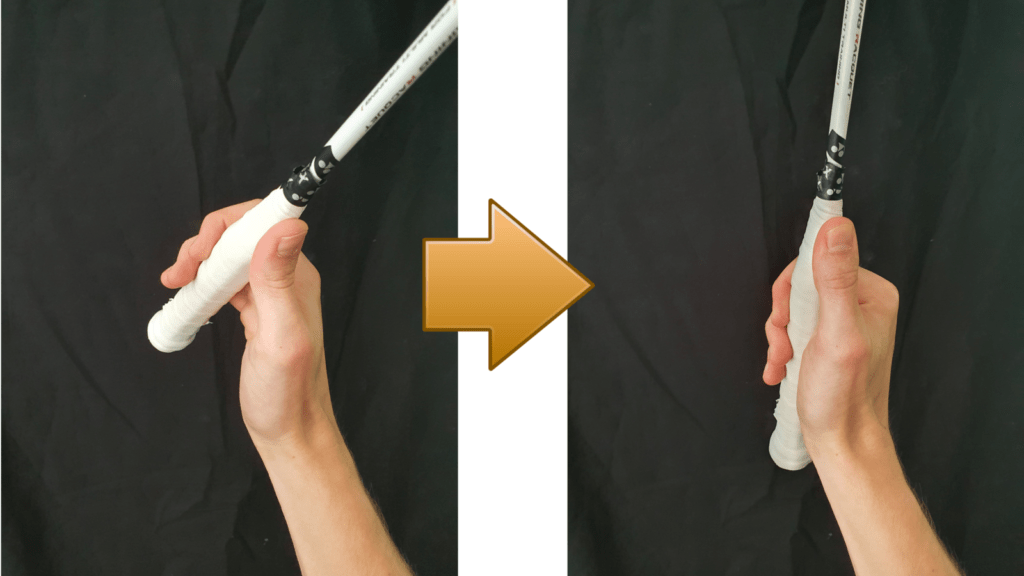
With the thumb grip it is a little bit easier to generate power, as the thumb helps the other fingers to tighten the grip explosivly. A perfect way to train it is by just playing the shuttle up in the air by only using the fingers and no arm movement at all.
If you are able to play shots with finger power you should also implement grip changes into your exercises so you learn to change quickly in between the grips. Especially in doubles you need to react fast and it will give your game a huge boost if you are good at adjusting your grip.
How to train those skills
So the good news: You do not need to work yourself through every single badminton shot but you can use overall skills to dramaticaly boost your learning curve. And I got even more good news: There are easy ways to practice these skills even at home and wihtout a partner. The following video is a 20 Minute practical session to work on the starting position, basic grip with rotation and the swing and kinetic chain (Skill Nr. 1-3):
This 25 Min session goes in detail on the grip variation and will help you to work on Skill Nr. 4:
I hope you have a good idea now of what to practice if you are starting out or what to teach your players in the beginning if you are a coach. Try not to think too much in shots but use the shots in your training as a tool to practice skills.
Tobi

